If you have just bought your new NodeMCU ESP-12E, here is the step-by-step guide to set it up for use with the Arduino IDE:
Step 1: Open the Arduino IDE and click on File > Preferences.
Step 2: On the Setting window that pops up, click the icon at the end of the textbook for Additional boards manager URLs.
Step 3. On the textbox that appears, paste this link: http://arduino.esp8266.com/stable/package_esp8266com_index.json
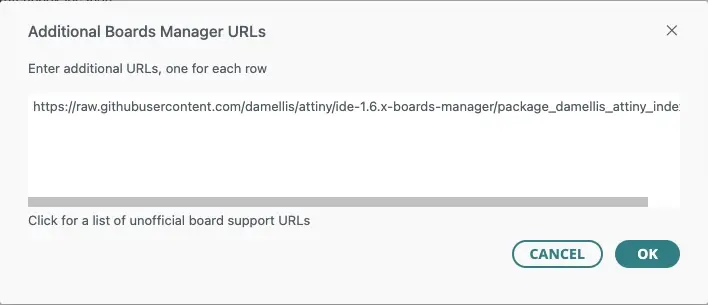
Step 4: Click OK to close the list and click OK again to close the Preferences window.
Step 5: Open Board Managers and search for esp8266.
Step 6: From the results, search for esp8266 by ESP8266 Community and click Install.

Step 7: Connect the NodeMCU ESP8266 board to the computer using a USB cable.
Step 8: On the Arduino IDE, click Tool > Board > esp8266 > NodeMCU 1.0 (ESP-12E Module).
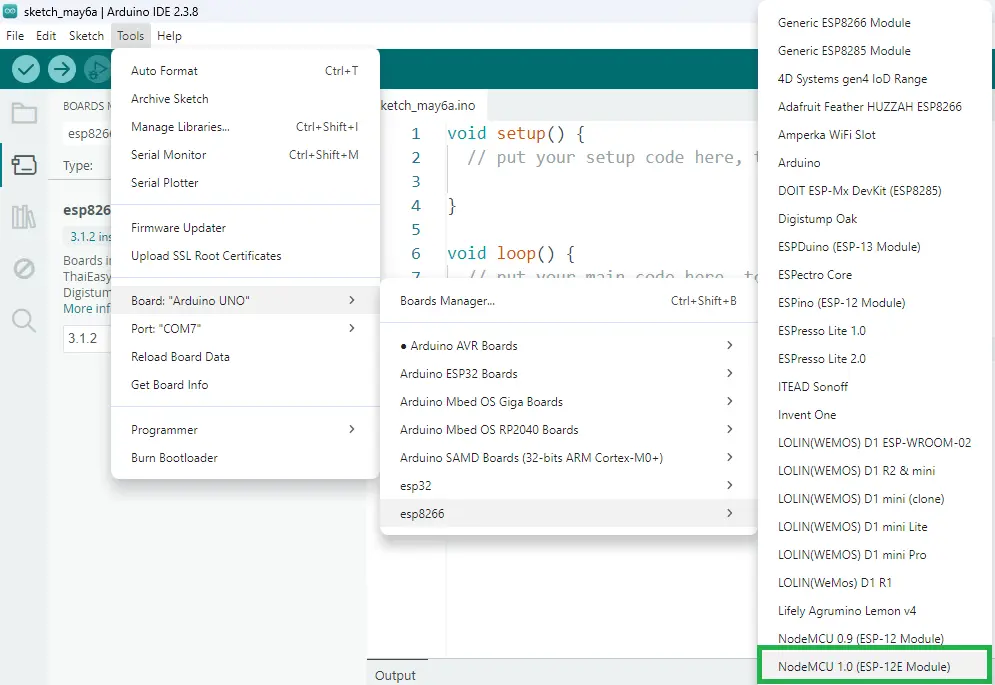
Step 9: Click the dropdown arrow on the Board Selection box and click then click Select other board and port
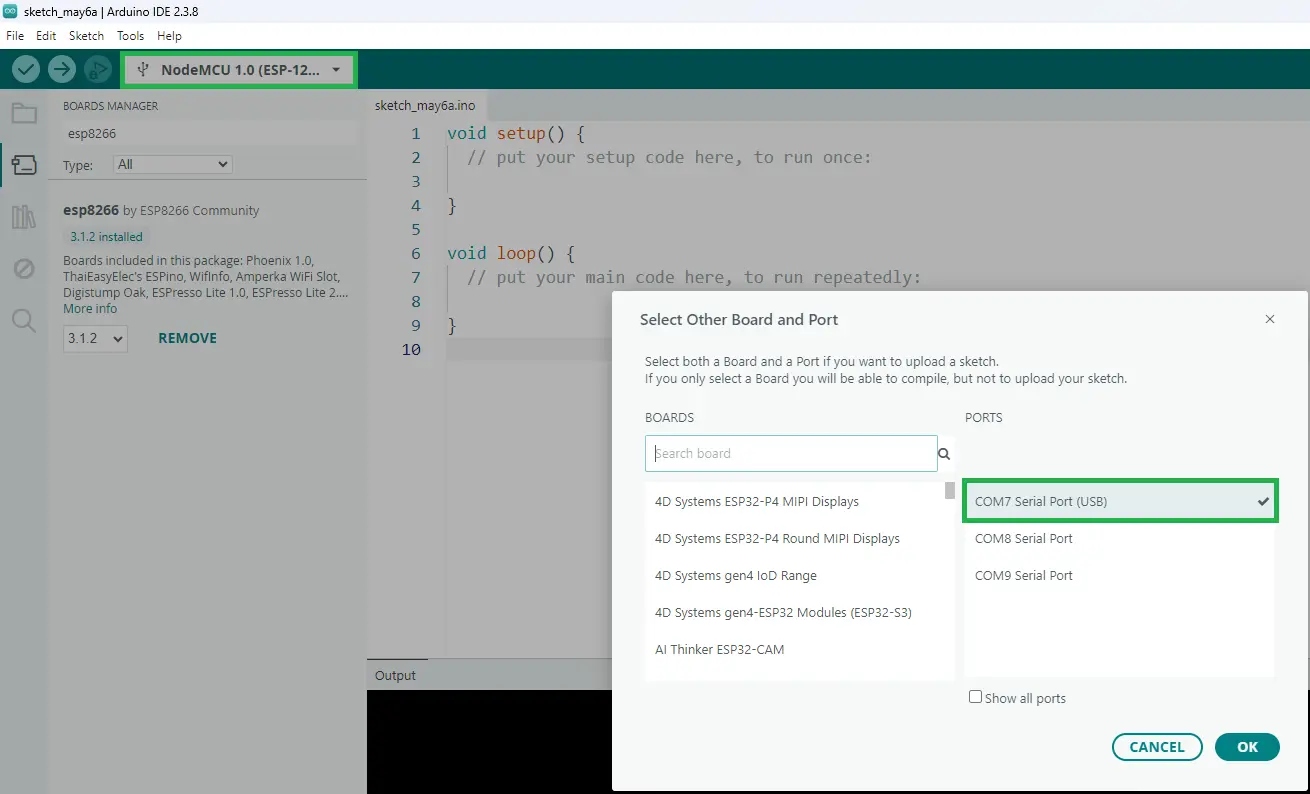
Step 10: Pick the communication port that has the word “USB” inside parenthesis and click OK.
After all of the steps above, you should be able to Upload a program to the NodeMCU ESP8266 board. To test this, continue with the following steps.
Step 11: Click File > Examples > ESP8266 > Blink.
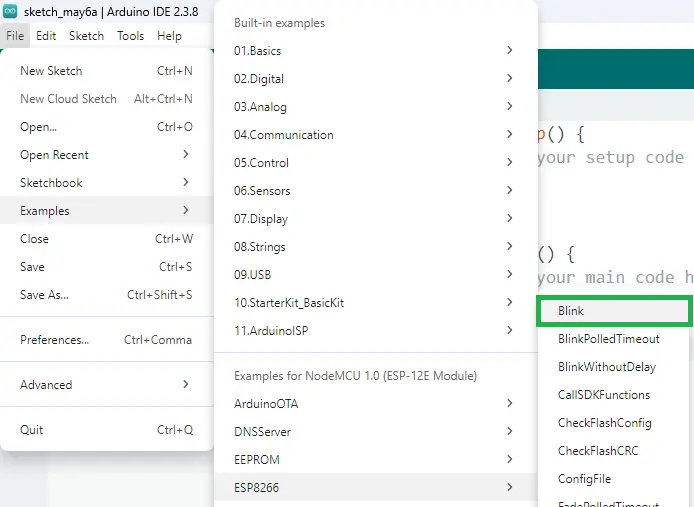
Step 12: On the Blink sketch window, click the Upload button.
And that is it! If you have done everything correctly, the onboard LED of the NodeMCU ESP-12E should be blinking.
Note: There is a known issue regarding the compatibility of the USB driver CH340 and NodeMCU ESP8266. If you encounter such problem, try to roll back the CH340 driver of your computer to an earlier version.