Project Overview
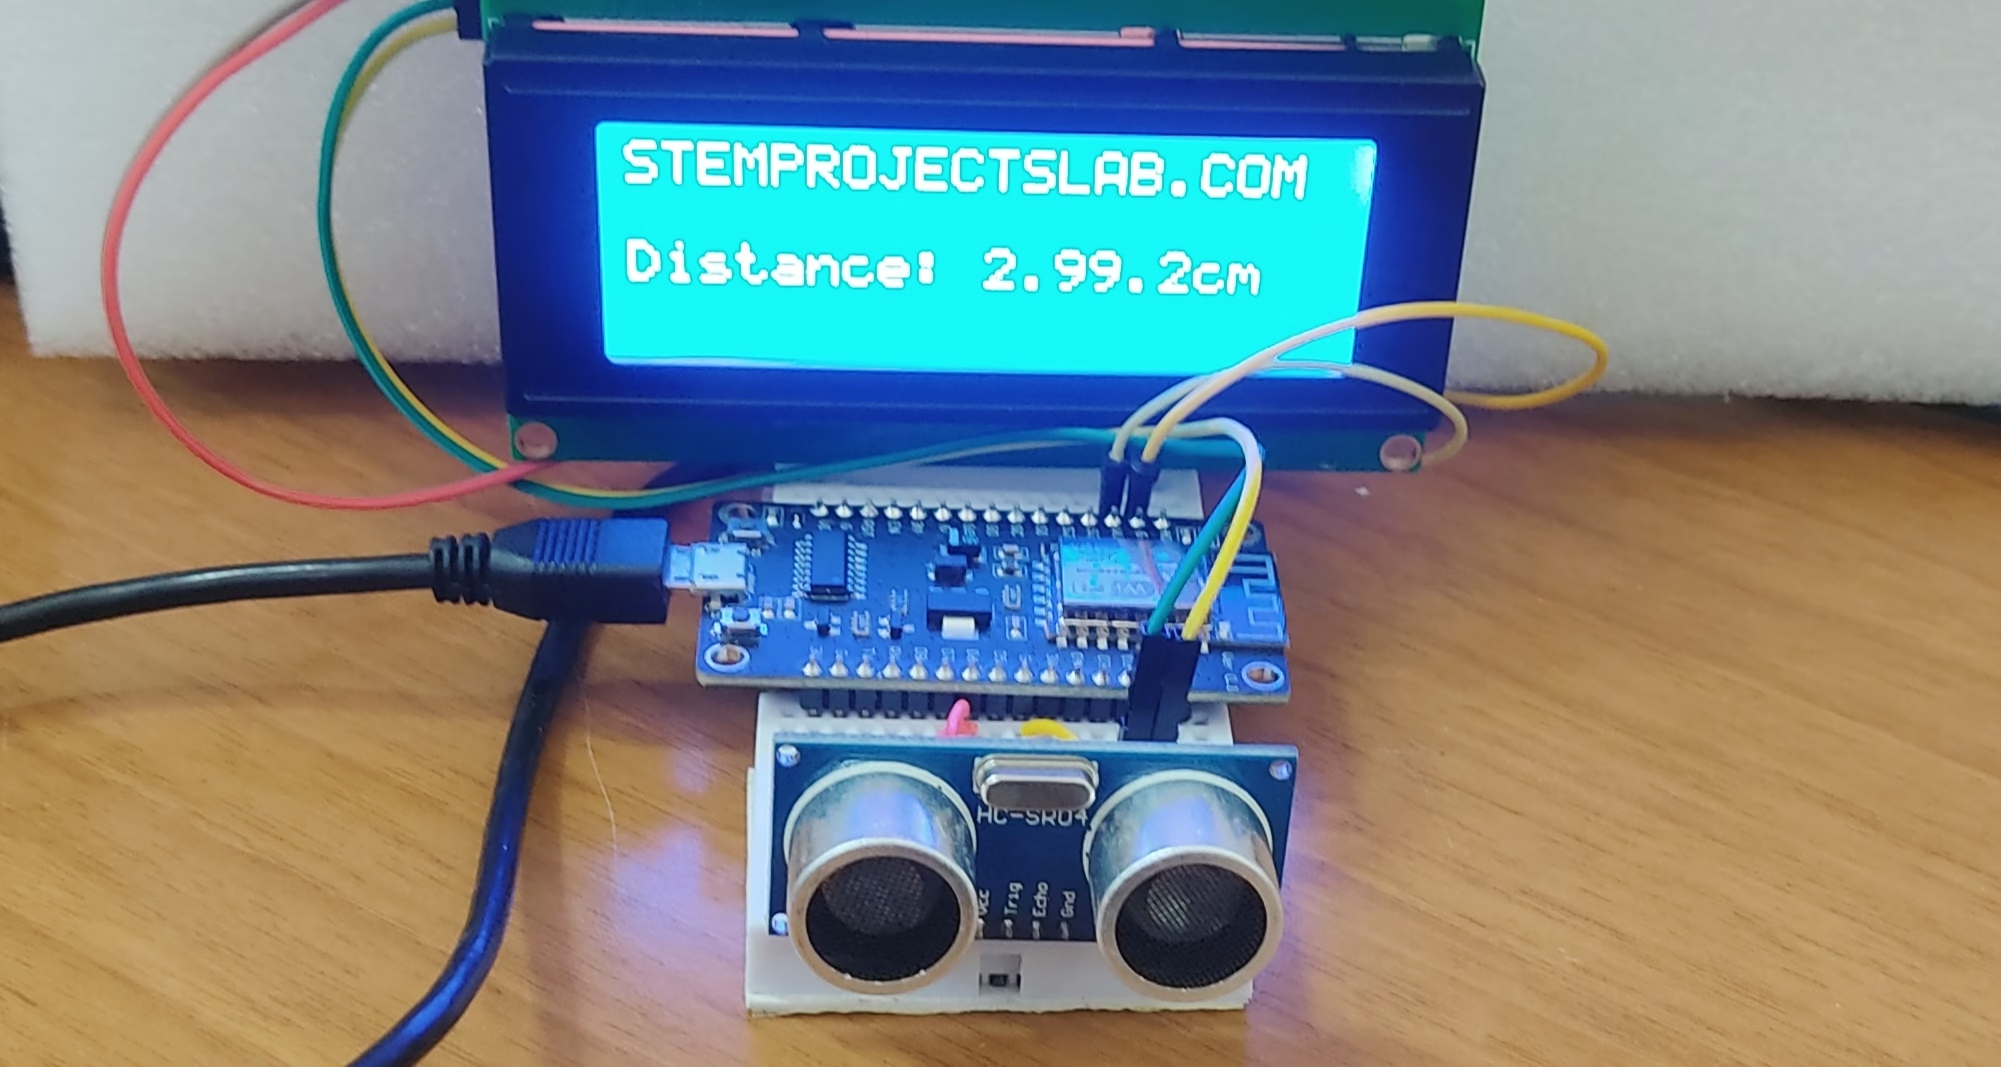
This project uses the HC-SR04 Ultrasonic Distance Sensor to measure the distance of an object and display that reading on a 20×4 LCD I2C screen.

Components List
For this project, we will be using the following:
- HC-SR04 Ultrasonic Sensor
- 20×4 I2C LCD
- NodeMCU ESP-12E
- Breadboard and Jumpers
Wiring Diagram
The diagram for the Ultrasonic Distance Measurement is shown below.

As shown above, we have the HC-SR04 powered by the 3V and ground pins of the NodeMCU board. The trigger pin is connected to GPIO12 or D6 and the echo pin is connected to GPIO13 or D7. For the display, it is powered thru the VU and GND of the NodeMCU. SCL is connected to D1 and SDA is connected to D2.
Source Code
Here is the complete code for our project. The line-by-line code explanation can be read further below.
#include <LiquidCrystal_I2C.h>

const int trigPin = 12, echoPin = 13;

long pulseDuration;
float distance;

LiquidCrystal_I2C lcd(0x27,20,4);

void setup()
{
  Serial.begin(9600);
  pinMode(trigPin, OUTPUT);
  pinMode(echoPin, INPUT);
  lcd.init();
}

void loop()
{
  //Set trigPin to LOW
  digitalWrite(trigPin, LOW);
  delayMicroseconds(2);

  //Emit a HIGH pulse for 10 microseconds
  digitalWrite(trigPin, HIGH);
  delayMicroseconds(10);
  digitalWrite(trigPin, LOW);

  //Listen until a HIGH pulse by echoPin is received; record the duration in microseconds
  pulseDuration = pulseIn(echoPin, HIGH);

  //distance = (pulseDuration x speed of sound)/2
  distance = pulseDuration * 0.034/2;

  Serial.print("Distance: ");
  Serial.print(distance);
  Serial.println("cm");

  lcd.backlight();
  lcd.setCursor(0,0);
  lcd.print("STEMPROJECTSLAB.COM");
  lcd.setCursor(0,2);
  lcd.print("Distance:");
  lcd.setCursor(10,2);
  lcd.print(distance);
  lcd.setCursor(16,2);
  lcd.print("cm");
  delay(1000);
}
Code Explanation
Here is how we built the code:
#include <LiquidCrystal_I2C.h>
This program use the LiquidCrystal I2C library by Frank de Brabander and LiquidCrystal_I2C.h is being used for program execution.
const int trigPin = 12, echoPin = 13;
GPIO12 is assigned for the trigger pin and GPIO13 is assigned to the echo pin of the HC-SR04 Ultrasonic Distance Sensor.
long pulseDuration;
float distance;
The variable pulseDuration is created using the data type long and the variable distance is also created using the float data type.
LiquidCrystal_I2C lcd(0x27,20,4);
This line creates an object with the name lcd and the information about the specific LCD module is supplied within the parenthesis. The 0x27 is the hex address of the module. The number 20 refers to the number of columns and the number 4 refers to the number or rows of the display.
Serial.begin(9600);
pinMode(trigPin, OUTPUT);
pinMode(echoPin, INPUT);
lcd.init();
For the setup(), the Serial Monitor is initialized at a speed of 9600 bauds. The trigger pin is set to OUTPUT mode and the echo pin is set to INPUT. The LCD named lcd is also initialized.
digitalWrite(trigPin, LOW);
delayMicroseconds(2);
Within the loop(), the lines above ensures that the trigger pin is truly turned OFF before a pulse is sent.
digitalWrite(trigPin, HIGH);
delayMicroseconds(10);
digitalWrite(trigPin, LOW);
These lines create the pulse that was sent towards the target. The specific pulse has a duration of 10 microseconds and after sending it, the trigger pin is again shut OFF.
pulseDuration = pulseIn(echoPin, HIGH);
This line uses the pulseIn function to wait for a HIGH pulse coming in from the echo pin. The value returned by the pulseIn function is saved as pulseDuration.
distance = pulseDuration * 0.034/2;
The line above does the calculation of distance based on the time which is stored as pulseDuration which is then multiplied by 0.034, the speed of sound in centimeters per microsecond. The product is the divided by two because the path is real distance is traversed by the sound wave twice. Once when it is transmitted and once as it bounces back.
Serial.print("Distance: ");
Serial.print(distance);
Serial.println("cm");
These lines print the calculated distance with the appropriate formatting to the Serial Monitor.
lcd.backlight();
lcd.setCursor(0,0);
lcd.print("STEMPROJECTSLAB.COM");
lcd.setCursor(0,2);
lcd.print("Distance:");
lcd.setCursor(10,2);
lcd.print(distance);
lcd.setCursor(16,2);
lcd.print("cm");
The lines above manages the printing of the distance to the LCD monitor.
delay(1000);
The line above completes the loop() which ensures that the measurement is taken every 1000 milliseconds or 1 second. This can be lowered to increase accuracy specially in cases where the target is moving.
And that’s it. Have you tried this project? Please tell us if you have any question or if you have any project idea that you want us to create.