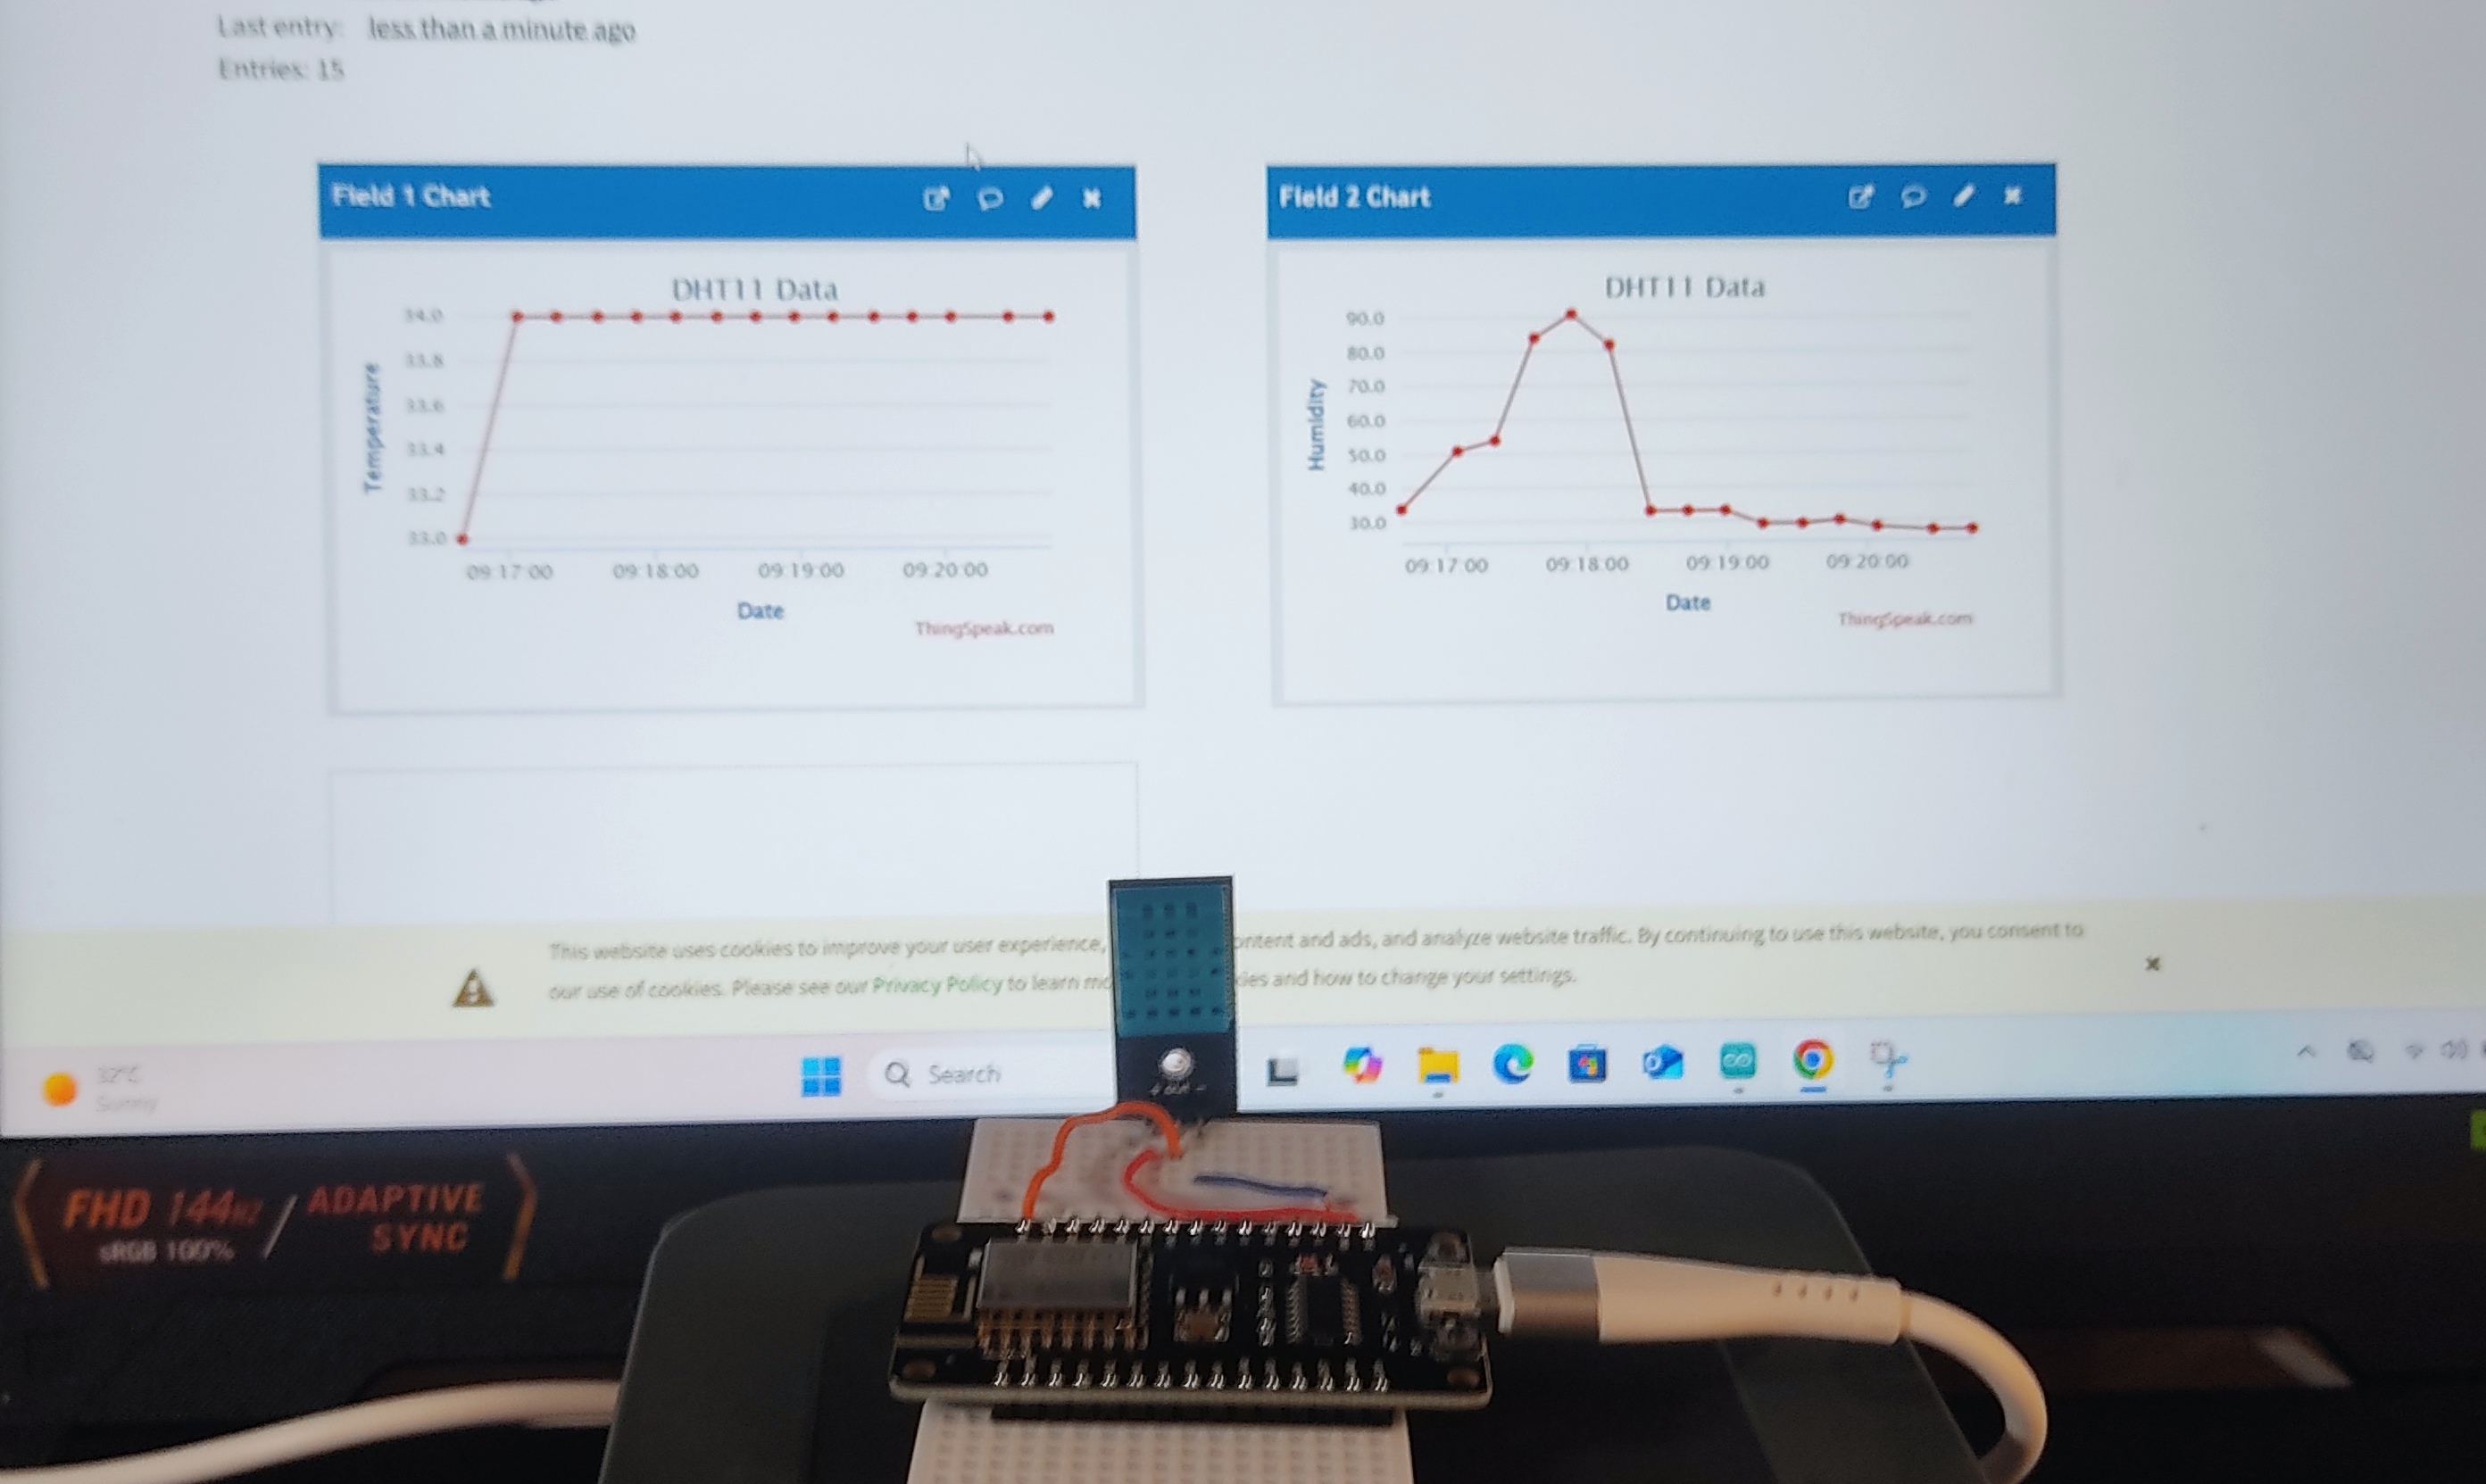
This tutorial will show you how to connect the DHT11 with the NodeMCU ESP-12E and then log the data from the DHT11 to ThingSpeak.
This will be divided into three parts: hardware setup, programming and ThingSpeak integration.
Part 1: Hardware Setup
For this project, we will be using the following:
- NodeMCU ESP-12E
- DHT11 Temperature and Humidity Sensor
- Breadboard and jumper wires
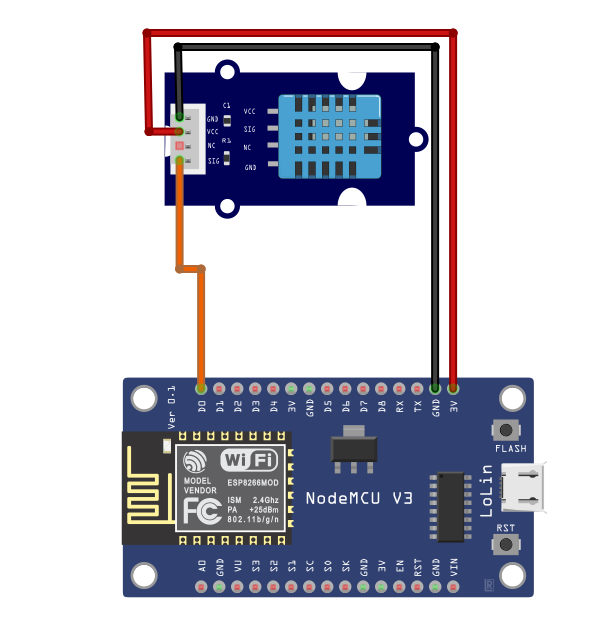
The connection is just simple. As shown in the diagram, VCC and GND of the DHT11 are connected to 3.3V and GND of the NodeMCU. The signal pin is connected to the NodeMCU pin D0 which corresponds to GPIO16.
Part 2: Programming
For those of you who immediately want to copy the complete code for this project, here is the complete program. The step-by-step and detailed explanations are shown later for those who want to gain more understanding of the coding process.
#include "DHT11.h"
int temperature, humidity;
DHT11 dht11(16);

void setup() {
    Serial.begin(9600);
}

void loop(){
    int reading = dht11.readTemperatureHumidity(temperature, humidity);
    Serial.print("Temperature: ");
    Serial.print(temperature);
    Serial.print(" degrees Celsius \tHumidity: ");
    Serial.print(humidity);
    Serial.println("%");
}
Here is the step-by-step process that led us to the program above.
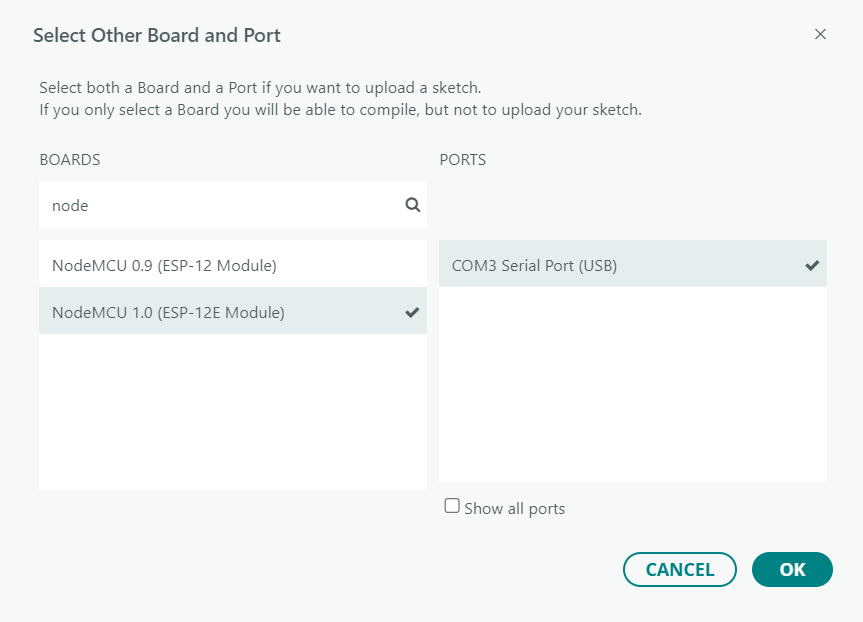
Step 1: Connect the board to the computer and select the NodeMCU 1.0 (ESP-12E Module) from the boards and the corresponding port where the board is connected.
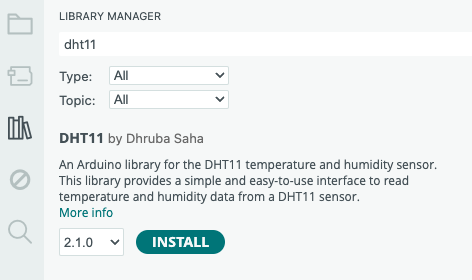
Step 2: In the library manager, search for the library DHT11by Dhruba Saha and install it.
Step 3: For the program header, we will use the header file “DHT.h” from the DHT11 library so in line 1 we write:
#include "DHT11.h"
Step 4: We will also create the variables, temperature and humidity by writing:
int temperature, humidity;
Step 5: Let us create an instance of DHT11 class with the signal pin attached to GPIO16 by writing:
DHT11 dht11(16);
Step 6: In setup(), we will initialize the Serial Monitor at 9600 bauds by writing:
Serial.begin(9600);
Step 7: Inside the loop, we will read the temperature and humidity values from the DHT11 sensor using this line:
int reading = dht11.readTemperatureHumidity(temperature, humidity);
Step 8: We will then print the readings of temperature and humidity using the following lines:
Serial.print("Temperature: ");
Serial.print(temperature);
Serial.print(" degrees Celsius \tHumidity: ");
Serial.print(humidity);
Serial.println("%");
The complete code is shown below:
#include "DHT11.h"
int temperature, humidity;
DHT11 dht11(16);

void setup() {
    Serial.begin(9600);
}

void loop(){
    int reading = dht11.readTemperatureHumidity(temperature, humidity);
    Serial.print("Temperature: ");
    Serial.print(temperature);
    Serial.print(" degrees Celsius \tHumidity: ");
    Serial.print(humidity);
    Serial.println("%");
}
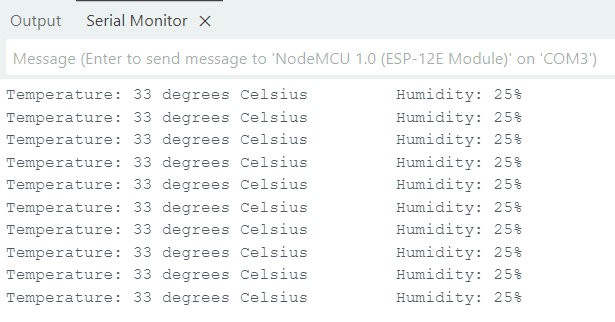
We can now upload this code to the NodeMCU by pressing on the upload button. If the hardware setup and programming is properly done, we should be able to see the following output in the Serial Monitor.
If everything is fine up to this point, we will now proceed to the third part.
Part 3A: ThingsSpeak Setup
We will be assuming that you have already signed up for a ThingSpeak by MathWorks account, so we will begin by creating a new channel for this project.
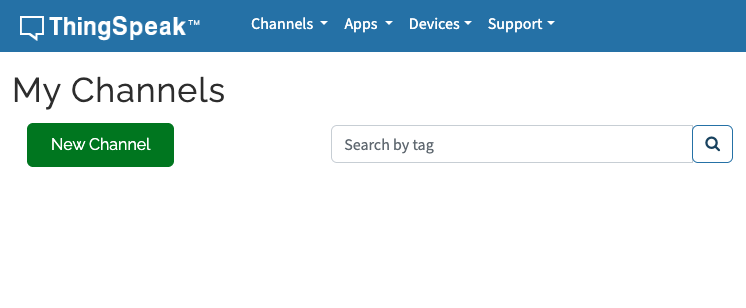
Step 1: In your ThingSpeak dashboard My Channels, click on the “New Channel” button.
Step 2: Give your channel a name and description. For our project, we will name it DHT11 Data and in the description, we will write “DHT11 Data Upload Tutorial by STEMProjectsLab.”
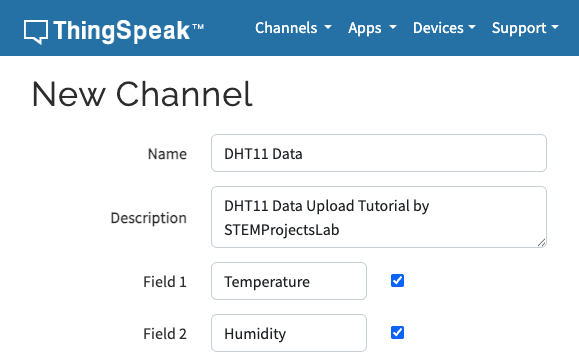
Step 3: We are uploading two streams of data, temperature and humidity so we will check two Field boxes and label them Temperature and Humidity.
Step 4: We can leave the other fields as they are and now click Save Channel to create the ThingSpeak Channel.
Step 5: If everything is done correctly, you should be able to see the channel page similar to this:
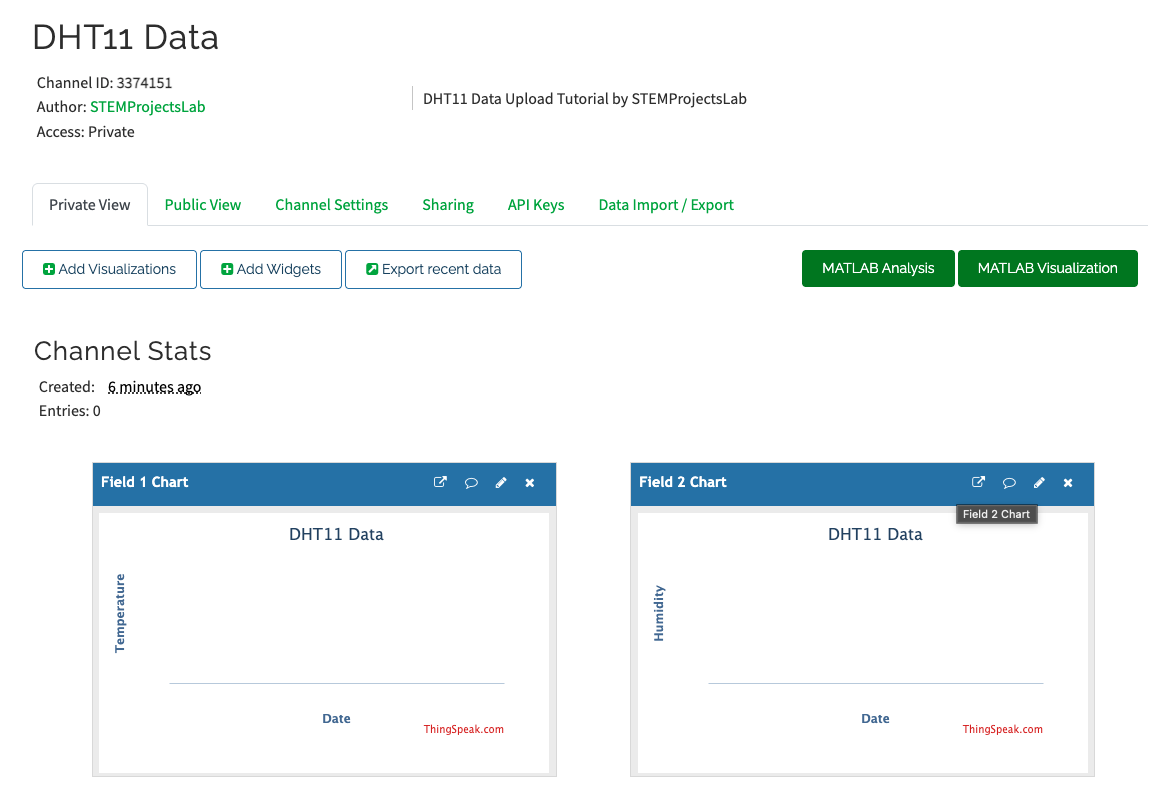
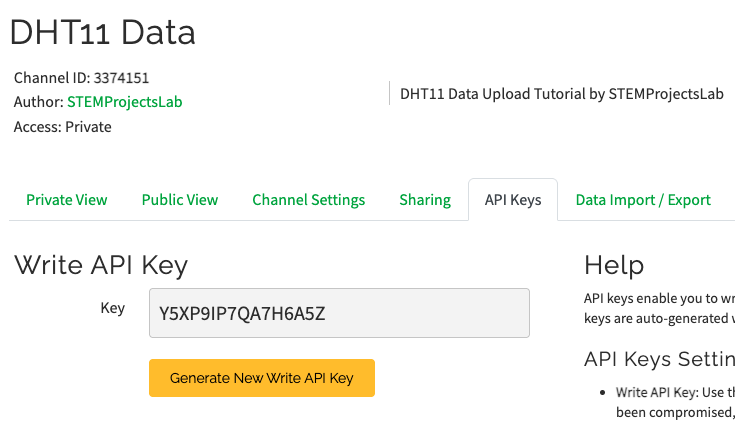
To be able to send data to ThingSpeak using the NodeMCU and DHT11 combination, we need to take note of these two information: Channel ID and Write API Key
Step 6: Copy the channel ID number and get the Write API Key from the API Keys tab.
Step 3B. ThingSpeak Integration
At this point, we have the information needed for our code integration with ThingSpeak. We will now go back to our Arduino IDE to install some libraries and to finally edit our code so that our data gets uploaded to the cloud via ThingSpeak.
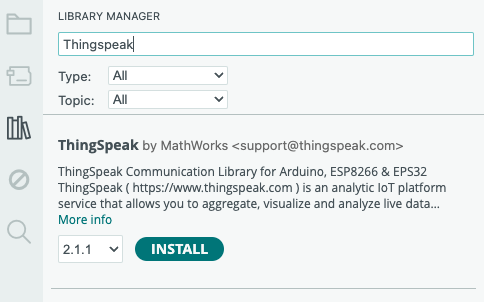
Step 1: Open the Arduino IDE Library Manager and then search for the library ThingSpeak by Mathworks. Click install to have it added to our library.
Step 2: On our codes header part, we will add the header files “ESP8266WiFi.h” and “ThingSpeak.h” from their respective libraries, so we will insert them to our original code as shown below:
#include "DHT11.h"
#include "ESP8266WiFi.h"
#include "ThingSpeak.h"
int temperature, humidity;
DHT11 dht11(16);
Step 3: We will also add the following lines to establish a WiFi connection to an available network and to establish the connection to our ThingSpeak channel. Replace YourWiFiID, YourWiFiPassword, YourChannelNumber and YourAPIKey with the values appropriate for you. Do not remove the quotation marks:
char ssid[] = "YourWiFiID";
char pass[] = "YourWiFiPassword";
int keyIndex = 0;
WiFiClient  client;

unsigned long myChannelNumber = YourChannelNumber;
const char * myWriteAPIKey = "YourAPIKey";
Step 4: For the setup(), we will change our connection speed to 115200 bauds from the initial value of 9600 bauds. We will also set the WiFi mode to a station and we will also initialize ThingSpeak, as shown below:
void setup() {
  Serial.begin(115200);
  WiFi.mode(WIFI_STA);
  ThingSpeak.begin(client);
}
Step 5: For our loop now, we will begin by reading the data from the DHT11 and printing those on the Serial Monitor. After that, will then attempt to connect to the network using these lines:
int reading = dht11.readTemperatureHumidity(temperature, humidity);
Serial.print("Temperature: ");
Serial.print(temperature);
Serial.print(" degrees Celsius \tHumidity: ");
Serial.print(humidity);
Serial.println("%");

if(WiFi.status() != WL_CONNECTED){
    Serial.print("Attempting to connect to Network ");
    while(WiFi.status() != WL_CONNECTED){
      WiFi.begin(ssid, pass);
      Serial.print(".");
      delay(5000);
    }
    Serial.println("\nConnected to network.");
  }
Step 6. Once connection is established, we can proceed to setting the fields and the values for each. We will set field1 for temperature and field2 for humidity as shown below:
ThingSpeak.setField(1, temperature);
ThingSpeak.setField(2, humidity);
Step 7: The lines below write the temperature and humidity data to our ThingSpeak channel. It will also alert us if there is an error in the process.
int x = ThingSpeak.writeFields(myChannelNumber, myWriteAPIKey);
  if(x == 200){
    Serial.println("Channel update successful.");
  }
  else{
    Serial.println("Problem updating channel. HTTP error code " + String(x));
  }
Step 8: Finally, we will set a delay of 15 seconds, which is also the limit of update frequency for free ThingSpeak channels.
Here is our complete code:
#include "DHT11.h"
#include "ESP8266WiFi.h"
#include "ThingSpeak.h"
int temperature, humidity;
DHT11 dht11(16);

char ssid[] = "YourWiFiID";
char pass[] = "YourWiFiPassword";
int keyIndex = 0;
WiFiClient  client;

unsigned long myChannelNumber = YourChannelNumber;
const char * myWriteAPIKey = "YourAPIKey";

void setup() {
  Serial.begin(115200);
  WiFi.mode(WIFI_STA);
  ThingSpeak.begin(client);
}

void loop(){

    int reading = dht11.readTemperatureHumidity(temperature, humidity);
    Serial.print("Temperature: ");
    Serial.print(temperature);
    Serial.print(" degrees Celsius \tHumidity: ");
    Serial.print(humidity);
    Serial.println("%");

    if(WiFi.status() != WL_CONNECTED){
        Serial.print("Attempting to connect to Network ");
        while(WiFi.status() != WL_CONNECTED){
            WiFi.begin(ssid, pass);
            Serial.print(".");
            delay(5000);
       }
       Serial.println("\nConnected to network.");
    }

    ThingSpeak.setField(1, temperature);
    ThingSpeak.setField(2, humidity);

    int x = ThingSpeak.writeFields(myChannelNumber, myWriteAPIKey);
      if(x == 200){
        Serial.println("Channel update successful.");
      }
      else{
        Serial.println("Problem updating channel. HTTP error code " + String(x));
      }

    delay(15000);

}
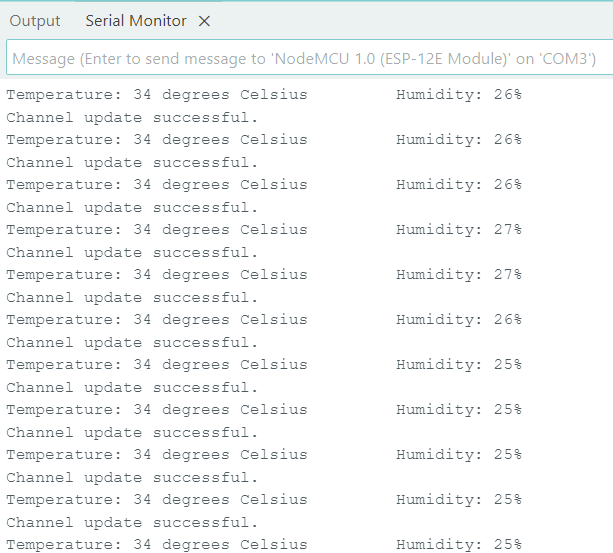
We can now upload this to our board by clicking on the Upload button on the Arduino IDE. If everything went as planned, this should be shown in the Serial Monitor:
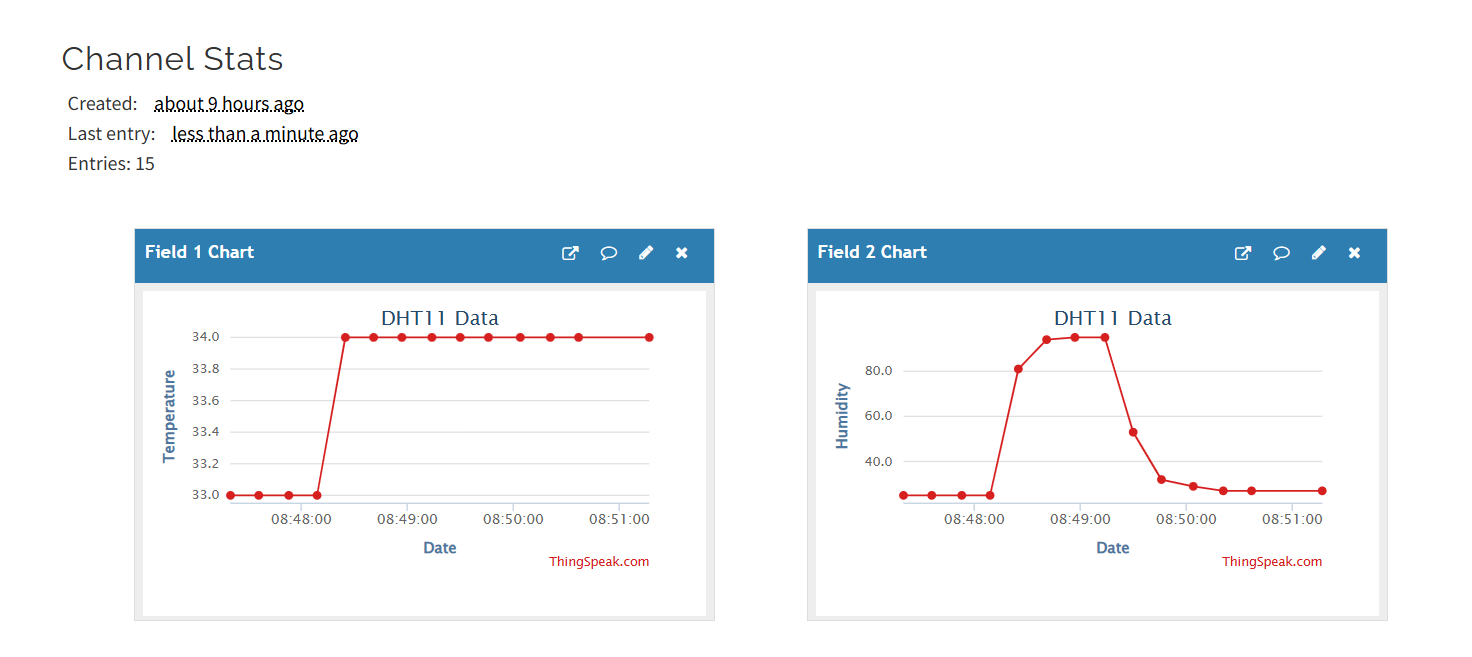
On the ThingSpeak website, you must be able to see the visualization similar to this one in the Private View Tab.
We hope you are able to follow along and learned along the way. Do not hesitate to post any questions if you have any in the comments section.